


How to Make a Cortado at Home
Pour equal weights of espresso and lightly steamed milk, then adjust by a few grams to keep the coffee flavor clear.

Espresso extraction happens when hot water moves through finely ground coffee under pressure, dissolving compounds that contribute flavor and carrying them into your drink. The result depends on what the coffee contains, how evenly water reaches it, and how much espresso you collect.
To understand a shot, separate three questions: How much coffee material was extracted? How concentrated is the drink? How evenly did extraction happen? A shot can be strong but poorly extracted, or reach a familiar time and still taste unbalanced.
You do not need a science background to understand the process. Start with the coffee and follow what happens as water passes through it.
The practical goal: wet the coffee evenly, measure how much coffee goes in and espresso comes out, and choose a recipe that tastes balanced. Time and pressure help explain the result.
Roasted coffee contains material that water can dissolve and material that remains behind. During brewing, water wets the grounds, dissolves accessible compounds, and transports them out of the coffee bed.
That transfer is extraction. Some material is readily accessible at exposed surfaces; some must move out from within the broken, porous structure of a coffee particle. Grinding makes more of that structure accessible.
The compact bed of coffee inside the filter basket is called the puck. The basket sits in the portafilter, the handled holder you lock into a traditional espresso machine. Water must travel through the small spaces between the grounds before the drink leaves the basket.
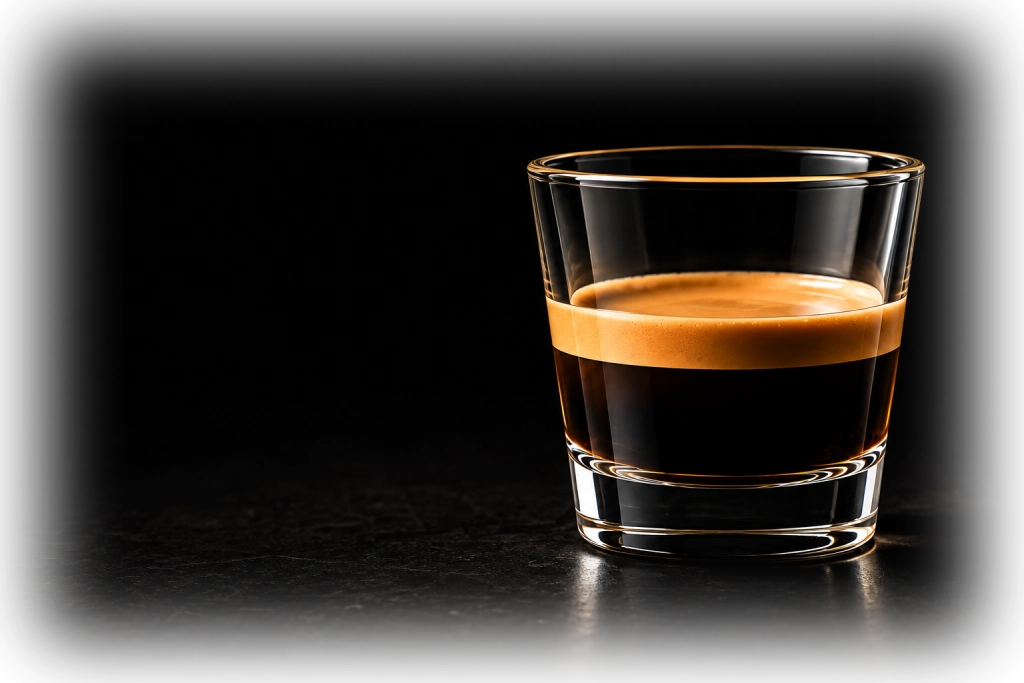
Espresso is more than dissolved coffee alone. It also carries tiny oil droplets and fine particles, which contribute to its texture. Its crema is a foam containing gas, much of it carbon dioxide released from roasted coffee. These parts help explain why espresso feels different from paper-filtered coffee.
The spent puck remains because brewing does not dissolve the entire dose. Extracting more material can improve an incomplete-tasting shot, but the goal is a pleasing balance from that coffee, rather than the largest possible number. For a definition of the drink itself, see what is espresso.

Four terms describe different parts of a shot. Keeping them separate makes espresso advice much easier to follow.
| Term | What it means | Example |
|---|---|---|
| Dose | Dry ground coffee used for the shot. | 18 g of grounds. |
| Output | Finished espresso collected, measured by weight. | 36 g of espresso. |
| Strength | The concentration of dissolved coffee material in the drink. | 10% total dissolved solids, or TDS. |
| Extraction yield | The percentage of the dry dose represented by extracted dissolved material in the drink. | 20% of an 18 g dose is 3.6 g. |
Brew ratio compares dose with output. An 18 g dose producing 36 g of espresso is a 1:2 ratio: one part dry coffee to two parts finished espresso by weight.
Recipes sometimes call the drink weight “yield.” In this guide, output means drink weight and extraction yield means the percentage extracted. A 36 g output is not a 36% extraction yield.
Here, strength means concentration, rather than caffeine content or roast darkness. A 10% TDS reading means dissolved coffee material makes up approximately 10% of the drink’s weight.
A scale measures dose and output. A coffee refractometer estimates TDS from a prepared liquid sample; that reading and the weights allow extraction yield to be calculated. A timer alone cannot tell you strength or extraction yield.
These variables interact throughout a shot. Following them in this order helps connect the coffee you start with to the taste you finish with:
It is a connected system rather than nine independent settings. Changing grind size, for example, changes both access to the coffee and resistance to water flow.
Origin, variety, processing, roasting and storage influence what is available to extract. Brewing reveals and changes the balance of those characteristics; it cannot turn one coffee into a completely different one. For the changes that occur before brewing, see how roasting changes coffee chemistry.
Roasting develops aroma and flavor compounds while changing the bean’s structure. Different roasts can therefore respond differently to the same recipe. A setting that suits one bag may produce a sharp, heavy or muted result with another.
Freshness matters too. Coffee releases carbon dioxide after roasting, while its aroma changes during storage. A newly roasted coffee may benefit from resting before brewing. Its useful resting period depends on the coffee, roast and storage, so a single number of days is not a universal rule.
Choose a coffee with a roast and flavor profile you enjoy. A naturally fruit-forward coffee can taste balanced while still tasting fruity. Brewing adjustments help you get the best from that profile.
Grinding exposes coffee to water. Smaller particles offer more surface area relative to their mass and shorter distances for dissolved material to travel out of them. To explore how accessible material dissolves, see coffee solubility and extraction.
Those particles also pack together differently. In many conventional recipes, grinding finer increases resistance and slows the delivery of a fixed output. Grinding coarser often does the reverse.
However, finer does not always mean better extraction. Excessive restriction can make flow uneven, leaving some regions poorly supplied with fresh water. A long, struggling shot can therefore extract inefficiently.
A grinder also produces a range of particle sizes, rather than identical grains. Two grinders can deliver the same shot time while creating different particle mixtures and tastes. This is why another person’s dial number is rarely a useful recipe for your machine.

More coffee changes the amount of material available and, in the same basket, usually creates a deeper bed. That affects resistance, space above the puck and the ratio between coffee and output.
Suppose you increase the dose from 18 g to 20 g but still collect 36 g. The brew ratio has changed from 1:2 to 1:1.8. Even before considering flow, these are different recipes.
Choose a dose suitable for your basket and machine. An 18 g example is useful for arithmetic, but it is not an instruction to put 18 g into every basket. Holding dose steady makes other changes easier to understand.
Water follows available routes through the puck. A bed with dense patches, loose areas or cracks may receive uneven flow. Some coffee can contribute much more to the drink than other coffee. Learn how machines wet the bed before full pressure in the guide to pre-infusion.
Distribution spreads loose grounds before tamping. Tamping compacts the bed; keeping it level supports a more consistent starting structure. Pressing harder does not repair poor distribution underneath.
Channeling describes preferential water flow through easier routes. It is one reason changing grind size may fail to solve an unpleasant shot: the problem may be where the water goes, not simply how quickly the drink arrives.
The appearance of a stream can provide clues, but cannot prove that every part of the puck extracted evenly. Repeatable preparation and repeatable taste are more useful than treating one visual sign as a complete diagnosis.
Water is the solvent: the liquid doing the dissolving. Its temperature affects how compounds dissolve and move, while its mineral composition can affect both extraction and the way the drink tastes. For a controlled comparison at home, see how brew temperature affects espresso.
Higher brewing temperature can help extract material from a coffee that is difficult to extract, but the result also depends on flow, output and the coffee itself. “Hotter equals better” is no more reliable than “finer equals better.”
The temperature shown on a machine is not necessarily the temperature throughout the puck. Heating design, warm-up and the condition of the brewing components matter. Follow your machine’s preparation instructions before judging a temperature setting.
Water chemistry is separate from temperature. Bicarbonate contributes to alkalinity, the water’s ability to neutralize acids. It can reduce the perceived brightness of coffee. A less acidic-tasting shot therefore does not automatically mean more extraction.
Use water that meets your machine manufacturer’s requirements. A filter can change some water properties without correcting all of them; “filtered” does not describe one fixed mineral composition.
Pressure supplies the driving force for water to pass through a compact coffee bed. Flow rate describes how much water moves in a given time. A machine can build pressure against a highly resistant puck while very little espresso reaches the glass. For guidance on interpreting a machine gauge, see espresso pressure and the 9-bar reference.
The flow that results depends on pressure, the puck’s resistance and the machine’s design. Reading a pressure gauge and watching how quickly espresso collects tell you different things about the same shot.
Around 9 bar is a common reference for conventional espresso brewing. It is not a taste guarantee, and a machine advertised with a 15- or 20-bar pump is not automatically better. Maximum pump capability is different from pressure during a shot.
Increasing pressure is not a reliable shortcut to extracting more desirable flavor. It can change flow and the behavior of the bed. A gauge reading also needs context: where and how pressure is measured matters.
Pre-infusion is an initial wetting stage before the main extraction phase. Some machines apply lower pressure, some control flow, and some include a pause. Extraction can already begin during this stage. Pre-infusion can help establish wetting, but cannot guarantee even extraction from a poorly prepared puck.
With a pressurized or dual-wall basket, the basket’s outlet adds resistance too. The visible stream reflects both the coffee bed and the basket, so interpret grind and pressure clues in that context.
For a home user, the useful starting point is understanding what the machine already does. Advanced pressure or flow profiling adds possibilities, but is not required to learn how extraction works.

As more water passes through the coffee, it can carry additional dissolved material into the drink. Later liquid is generally less concentrated than earlier liquid. Use the brew ratio chart to compare dose and output.
That creates an important relationship: a longer output can extract more material while producing a less concentrated espresso. The drink becomes larger faster than its dissolved coffee content grows.
Conversely, stopping earlier often makes a smaller, more concentrated drink, while collecting less total extracted material. Intensity alone therefore cannot tell you whether enough of the coffee was extracted.
Output weight is useful because crema makes volume variable. Two shots occupying the same space in a glass can have different liquid weights. Weighing the drink gives you a clearer basis for comparison.
Output is also different from the total water delivered by the machine. Some water remains in the puck, so a 36 g espresso does not mean only 36 g of water entered the basket.
Shot time describes duration. It reflects how quickly the chosen output arrived under that recipe’s conditions. For timing conventions and pre-infusion, see espresso shot time explained.
A conventional recipe may use roughly 25–30 seconds as a starting reference, but that is not a universal pass mark. Dose, output, pre-infusion, basket, coffee and brewing style affect how the number should be interpreted.
For your notes, use a consistent timing convention, such as pump start to stopping the shot, including pre-infusion. If the machine’s timer starts differently, record that difference.
“It took 28 seconds” tells you less than “18 g in, 36 g out, 28 seconds from pump start.” The fuller description lets you compare like with like.
Evaluate acidity, sweetness, bitterness, texture and finish together. Acidity can be pleasant; some bitterness is normal. A drying or rough sensation is different from bitterness, even when they appear together. For a tasting checklist, see what makes better espresso.
Stir the espresso and taste carefully as it cools enough to drink comfortably. The first impression of a very hot, concentrated sip may be difficult to describe.
Crema color, stream appearance and shot time are observations. Taste tells you whether the final combination is enjoyable. Record plain descriptions such as “sharp finish,” “heavy and bitter” or “sweet but too concentrated” rather than forcing every shot into a numerical category.
You may hear that espresso extracts acids first, sugars second and bitter compounds last. That is too rigid to explain a real shot.
Different compounds have different extraction behavior, but their release overlaps. Acids, caffeine and other dissolved material can already be present early in the shot. The composition and concentration of the liquid change as brewing continues.
Sweetness is also a sensory impression influenced by acidity, bitterness and aroma. Extending a shot does not simply switch on a separate “sugar stage.”
This is why tasting the finished drink matters more than memorizing a flavor timetable. Extending output may improve balance, or it may make an already satisfying shot thinner and less pleasant.
Under-extraction describes insufficient extraction for the desired result. A shot may taste sharply sour, lack sweetness or seem incomplete. But sourness alone cannot establish the cause: the coffee’s natural acidity and the drink’s concentration also matter.
Over-extraction is commonly used when extraction has gone beyond a pleasing balance, often with unwanted bitterness or drying sensations. Those sensations can also come from roast character, concentration or uneven flow. A slow shot is not automatically over-extracted.
Uneven extraction means different parts of the coffee contribute differently. It can leave conflicting flavors in the same drink. Sour and bitter tastes together are a reason to investigate the recipe and preparation, rather than proof of one specific fault.
These labels help describe possibilities. They become useful when paired with dose, output, flow behavior and repeatable comparisons.
Extraction yield is an average for the collected beverage. It does not show which compounds were extracted or how evenly water reached the coffee. Compare concentration and total material collected in espresso strength versus extraction.
Two shots with the same average extraction yield can therefore taste different. A pleasing result also depends on the coffee, concentration and distribution of extraction through the bed.
The often-quoted 18–22% range is a reference, not a universal boundary separating good espresso from bad. A number within that range cannot guarantee balance, and crossing its edge does not automatically make a shot defective.

Suppose you use an 18 g dose and collect 36 g of espresso. A correctly prepared refractometer sample reads 10% TDS. The drink therefore contains approximately 3.6 g of dissolved coffee material.
First, calculate the dissolved coffee:
36 g of espresso × 0.10 = 3.6 g
Then compare it with the dry dose:
3.6 g ÷ 18 g × 100 = 20% extraction yield
The table compares two shots using the same coffee, dose, grind and preparation, followed by a diluted version of the first shot. These are hypothetical measurements that illustrate the calculation, rather than predicted results for your machine.
| Preparation | Drink weight | TDS | Extraction yield |
|---|---|---|---|
| Collect 36 g of espresso. | 36 g | 10% | 20% |
| Collect 45 g through the puck in a separate shot. | 45 g | 8.8% | 22% |
| Add 9 g of plain water to the first 36 g shot. | 45 g | 8% | 20% |
45 g brewed through the puck. At 8.8% TDS, the cup contains 3.96 g of dissolved coffee. That is 22% of the original 18 g dose.
45 g made by adding water. The original 36 g shot still contains 3.6 g of dissolved coffee after you add 9 g of water. Its strength falls to 8% TDS and its extraction yield stays at 20%.
This distinction is useful when a shot tastes overpowering. Dilution can help you judge whether concentration is masking the flavors. It cannot repair the extraction that already happened.
You can make useful comparisons with a scale, timer and tasting notes. A refractometer is optional, and meaningful measurements require the correct sampling procedure.
The same principles apply to automatic machines, although the controls differ. A “strength” setting may change the dose, while a drink-size setting may change output or add water, depending on the model. Use the manual to understand what a button changes before treating it as an extraction adjustment.
Better espresso comes from understanding those relationships, then choosing a repeatable recipe that tastes right to you.
No. Strength describes how concentrated the drink is; extraction yield describes how much dissolved coffee was collected from the dose. A small, intense shot can have a lower extraction yield than a larger, less concentrated shot.
No. A 1:2 ratio describes dose and output weights. Extraction yield also requires the drink’s dissolved coffee concentration. Different shots at 1:2 can have different extraction yields.
Continuing the same shot can collect more dissolved material, but extra time alone does not guarantee better extraction. A separate, slower shot may have restricted or uneven flow. Compare the output and preparation as well as the duration.
No. Crema depends on gas, coffee characteristics and brewing conditions. It cannot measure extraction uniformity or tell you whether the drink tastes balanced.
No. Measured recipes and careful tasting are enough to guide useful improvements at home. A refractometer adds concentration data, but its readings still need interpretation alongside the recipe and taste.
Pour equal weights of espresso and lightly steamed milk, then adjust by a few grams to keep the coffee flavor clear.

Use your usual espresso dose, stop at a shorter yield, and taste both shots to find the texture and flavor you prefer.

Mark an espresso with a small spoonful of milk foam. Learn how to get the texture right and adjust the milk to suit the shot.



Leave a comment